
פסח מתקרב בצעדי ענק, ויהיה כאן בעוד מס' ימים ספורים.
אני רוצה לאחל לכולכם, בשמי ובשם הצוות, חג פסח שמח.
אני רוצה לאחל לכולכם, בשמי ובשם הצוות, חג פסח שמח.
Passover is fast approaching, and will be here in just a few days.
I want to wish you all, on behalf of myself and my design team, a very happy Passover.


ההדרכה החודשית - The Monthly Tutorial
אלו הכלים שהשתמשתי בהם:
2 ניירות מדוגמים (אחד היה שארית מפרוייקט אחר)
קארדסטוק לבן (אני השתמשתי בשאריות שנותרו מפרוייקטים קודמים)
עפרון וסרגל
גליוטינה (או סכין חיתוך)
חותמת, דיו ובלוק אקרילי
Silent Setter או מכשיר אחר לקיבוע ניטים
פאנץ' מעגל פינות (לא בתמונה)

חתכתי את נייר הרקע לגודל הרצוי - במקרה שלי 14 על 11 ס"מ

החתמתי את החותמת על קארדסטוק לבן.

חתכתי סביב ההחתמה, עיגלתי את הפינות וצבעתי את המסגרת בדיו.
רואים את הפס השחור הקטן מעל אחת הציפורים? זו כמובן טעות, אבל היא תתוקן בהמשך.

הנחתי את האלמנט המוחתם על צידו האחורי של הנייר המדוגם השני, וסימנתי קוים קטנים לחיתוך ריבוע גדול קצת יותר, כדי ליצור לי matting לאלמנט המוחתם.

חתכתי את הריבוע מהנייר המדוגם השני - רואים איך הגודל מתאים?

עיגלתי פיות וצבעתי את שולי הנייר הורוד

על שארית קארדסטוק אחרת החתמתי את הטקסט שלי.
רציתי לצייר עיגול ולא היתה לי תבנית. השתמשתי בקופסית הקטנה שיש בתוך האריזה של ה-Sillent Setter כדי לצייר עיגול סביב ההחתמה.

גזרתי בזהירות את העיגול, והחתמתי את שוליו.

הנחתי את הטקסט על האלמנט שלי - רואים איך עיגול הטקסט מסתיר את הטעות שהיתה לי בהחתמה?

שימו לב שהאלמנטים שלי רק מונחים על הדף - שום דבר עדיין לא מודבק.
אבל כך אני יכולה לתכנן איפה לחורר את הדף עבור הניטים, ואני מסמנת שתי נקודות קטנות.

והנה הניטים שלי במקומם.

אני מעבירה קצה של חוט דרך אחד הניטים, ומדביקה אותו בצד האחורי של הנייר. כך הוא לא יברח, ואני אוכל להגיע למתח חוט רצוי בלי בעיה.

אני מעבירה את החוט דרך הניטים, ומדביקה את הקצה השני של החוט לצידו האחורי של הנייר גם כן.

עכשיו ניתן להדביק את האלמנטים הנוספים לדף.
אני הוספתי מסגרת בדודלינג.
עכשיו כל שנותר הוא להדביק את הכרטיס על בסיס, לכתוב ברכה, ולהגיש.


I want to wish you all, on behalf of myself and my design team, a very happy Passover.

המנצחת בסקיצה 111 היא:
The winner for sketch 111 is:

אורית - Orit
והשלישיה המובילה:
And the Top 3:

שלשירר - Shellshearer

נוכחת לפעמים - Sometimes Present

ליביטי - Libeety
והנה הסקיצה החדשה שלנו, סקיצה 113:
And here's our new sketch, No 113:

האתגר הנילווה לסקיצה הוא: חוט. יש להשתמש בחוט ביצירה.
The challenge for this sketch is: string. You must use a string in your creation.
והנה עבודות הצוות:
And here's what the team created:

קרין די - Karin Di

ריקי - Riki

זהבית - Zehavit

דיילי - Dailly
ההדרכה החודשית - The Monthly Tutorial
אלו הכלים שהשתמשתי בהם:
2 ניירות מדוגמים (אחד היה שארית מפרוייקט אחר)
קארדסטוק לבן (אני השתמשתי בשאריות שנותרו מפרוייקטים קודמים)
עפרון וסרגל
גליוטינה (או סכין חיתוך)
חותמת, דיו ובלוק אקרילי
Silent Setter או מכשיר אחר לקיבוע ניטים
פאנץ' מעגל פינות (לא בתמונה)
These are the tools I used:
2 patterned papers (one was a left over piece)
White cardstock (I used left overs from other projects)
A pencil and a ruler
A guillotine or a cutting knife
a stamp, ink and an acrylic block
Sillent setter or another eyelet tool
A corner rounder punch (not in this photo)

חתכתי את נייר הרקע לגודל הרצוי - במקרה שלי 14 על 11 ס"מ
I cut the background paper to the desired size - in my case 14 by 11 cm.

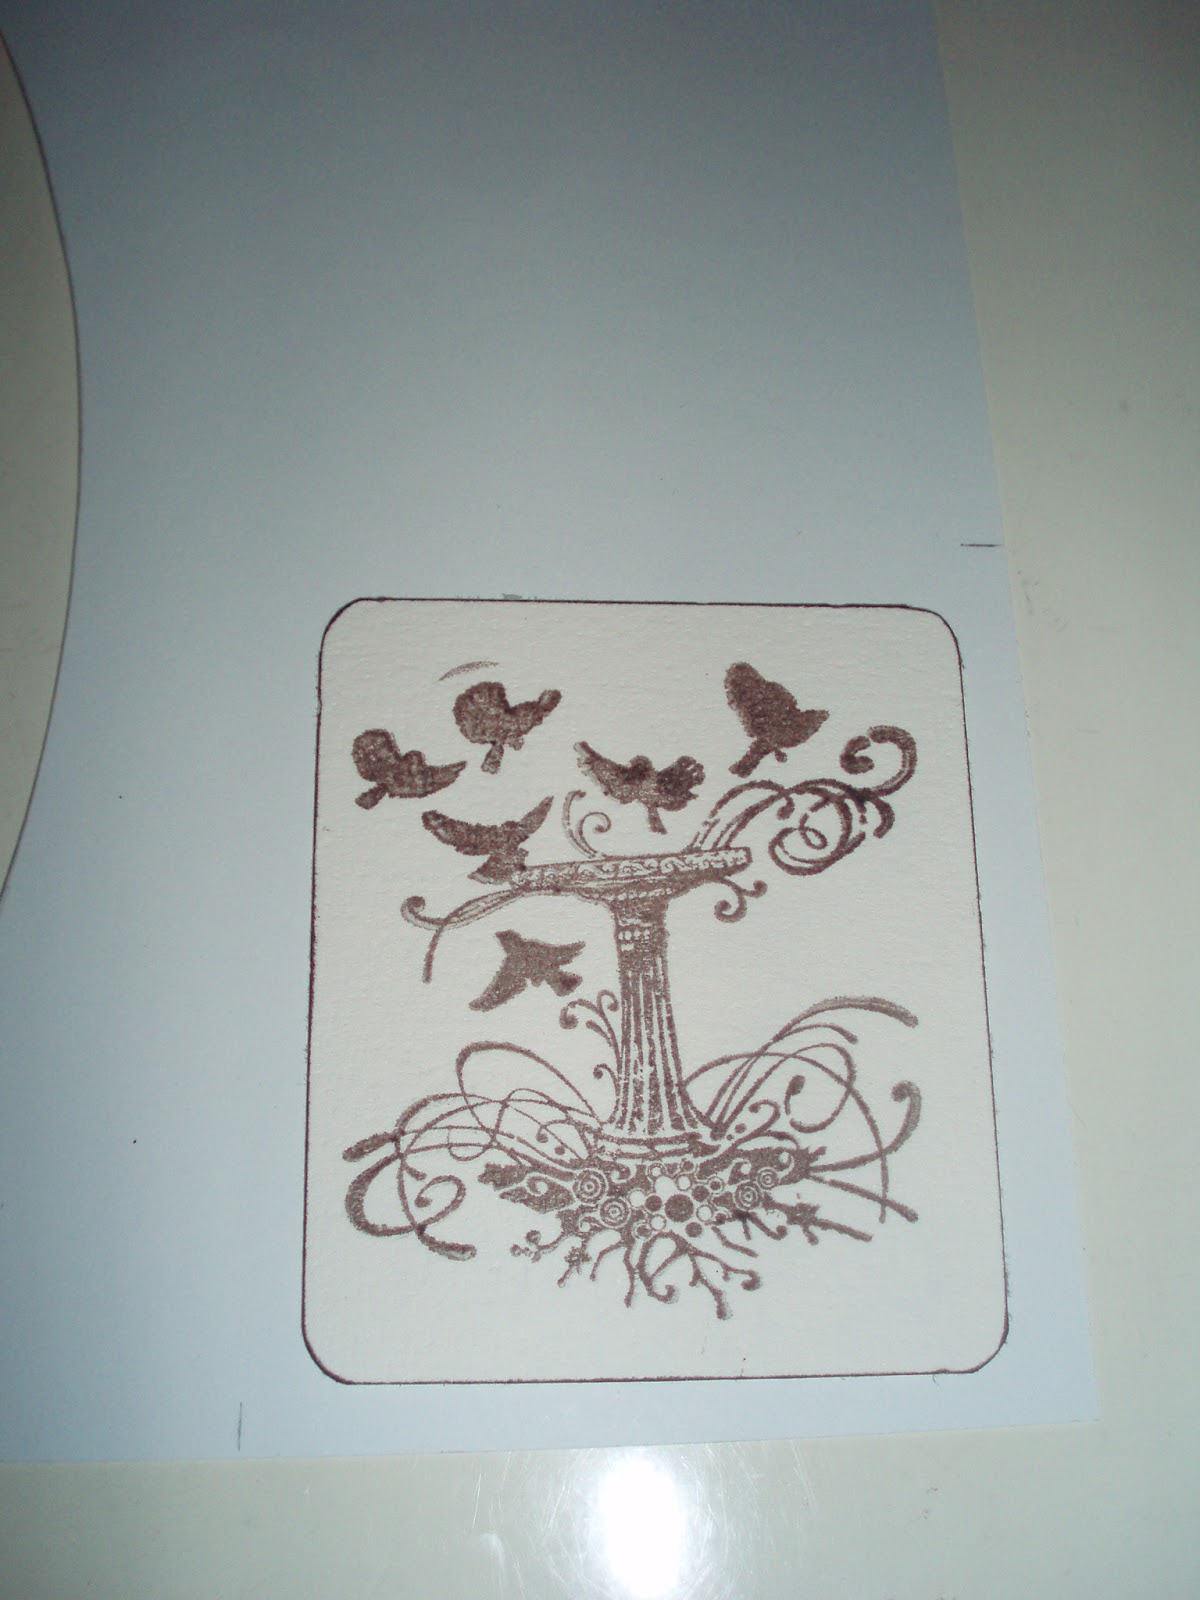
החתמתי את החותמת על קארדסטוק לבן.
I stamp my image on a white cardstock

חתכתי סביב ההחתמה, עיגלתי את הפינות וצבעתי את המסגרת בדיו.
רואים את הפס השחור הקטן מעל אחת הציפורים? זו כמובן טעות, אבל היא תתוקן בהמשך.
I cut around the stamped image, rounded the corners, and inked the edges.
Do you see the little black line above one of the birds? It's obviously a mistake, but it will be fixed later on.

הנחתי את האלמנט המוחתם על צידו האחורי של הנייר המדוגם השני, וסימנתי קוים קטנים לחיתוך ריבוע גדול קצת יותר, כדי ליצור לי matting לאלמנט המוחתם.
I placed the stamped element on the back side of the second patterned paper, and marked lines for a little larger rectangle, to create a matting for the stamped element.
חתכתי את הריבוע מהנייר המדוגם השני - רואים איך הגודל מתאים?
I cut the rectangle of the 2nd patterned paper. See how it fits?

עיגלתי פיות וצבעתי את שולי הנייר הורוד
I rounded the corners and inked the edges of the pink paper

על שארית קארדסטוק אחרת החתמתי את הטקסט שלי.
רציתי לצייר עיגול ולא היתה לי תבנית. השתמשתי בקופסית הקטנה שיש בתוך האריזה של ה-Sillent Setter כדי לצייר עיגול סביב ההחתמה.
I stamped my text on another piece of white cardstock.
I wanted to draw a circle around it but didn't have the right pattern. I used the little eyelet box that comes inside the Sillent Setter to draw the circle around my stamped text.

גזרתי בזהירות את העיגול, והחתמתי את שוליו.
I carefully cut the circle and inked its edges.

הנחתי את הטקסט על האלמנט שלי - רואים איך עיגול הטקסט מסתיר את הטעות שהיתה לי בהחתמה?
I placed my text on top of the center element. See how it hides my little mistake?

שימו לב שהאלמנטים שלי רק מונחים על הדף - שום דבר עדיין לא מודבק.
אבל כך אני יכולה לתכנן איפה לחורר את הדף עבור הניטים, ואני מסמנת שתי נקודות קטנות.
Note that all my elements are only laid onto the green paper - nothing is glued yet.
This way I can plan where to place my eyelets, and I mark the spots with two little pencil dots.

והנה הניטים שלי במקומם.
And here are the eyelets

אני מעבירה קצה של חוט דרך אחד הניטים, ומדביקה אותו בצד האחורי של הנייר. כך הוא לא יברח, ואני אוכל להגיע למתח חוט רצוי בלי בעיה.
I push one end of the string through one of the eyelets and glue it to place with a little scotch tape. This way it will stay put, and I can create the exact tension I want for the string.

אני מעבירה את החוט דרך הניטים, ומדביקה את הקצה השני של החוט לצידו האחורי של הנייר גם כן.
I wind the string through the eyelets until I get the desired look, and glue the other end of it on the back side of the paper as well.

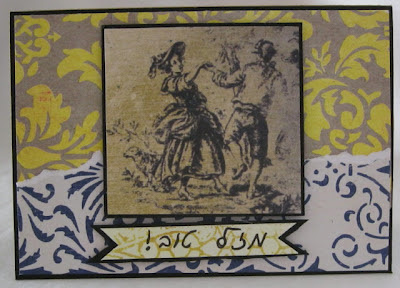
עכשיו ניתן להדביק את האלמנטים הנוספים לדף.
אני הוספתי מסגרת בדודלינג.
עכשיו כל שנותר הוא להדביק את הכרטיס על בסיס, לכתוב ברכה, ולהגיש.
Now you can glue all the other elements onto your front.
I added a doodled frame.
All that's left is to glue the front onto a card base, write your message and present it to whom ever you want.


3 תגובות:
יופי של עבודות. גם הפעם, כתמיד ,אני מבטיחה לעצמי להכין משהו על פי הסקיצה...נראה, אולי אעמוד בהבטחה.....
היה כייף להפגש אתמול, חג שמח דיילי יקרה :)
תודה על הבחירה. הסקיצה החדשה נהדרת וכך גם עבודות הצוות, מקווה שאספיק היום להכין,אחרת אפספס את האתגר הזה.
חג שמח לכולכן
אורית.
יששש!!!
בשעה טובה ומוצלחת הספקתי לעמוד באתגר... אהבתי את הרעיון של להוסיף את החוט דרך החורים...
הזדמנות נפלאה להשתמש בקאטלבג החדש והמקסים שקבלתי מחברות נפלאות שלי!!!
הוסף רשומת תגובה