
חודש יוני התחיל, וזה אומר שיש לנו היום...
נכון. הדרכה חודשית! הפעם הכינה זהבית את ההדרכה.

והשלישייה המובילה:


את ההדרכה החודש הכינה זהבית.
קארדסטוק בגודל 6*6 אינטש שישמש כבסיס לכרטיס.
נייר מדוגם בגודל 6*6 אינטש
2 ניירות קארדטוק בגוונים מתאימים לנייר המדוגם
בורדר (מקרה שלי שקף)
חותמות ודיו
קישוטים שונים

1. מדביקים את הבורדר אל הדף המדוגם (אין תמונה). מכיוון ששלי הוא בורדר משקף, הדבקתי רק בכמה נקודות של דבק עכבר, שאסתיר בהמשך.
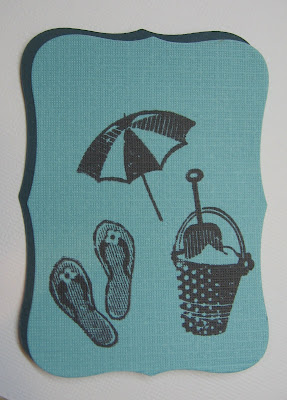
2. חותכים את שני דפי הקארדסטוק לצורה בה בחרנו להשתמש באלמנט המרכזי שלנו. שניהם באותו גודל בדיוק. ניתן להשתמש כמובן בחיתוכי נייר מוכנים מראש.

3. ממקמים את החותמות על הבלוק האקרילי ומחתימים על החיתוך הבהיר יותר.


4. מדביקים את חיתוך הנייר הבהיר על גבי חיתוך הנייר הכהה בהסטה הצידה ולמטה של כמה מילימטרים, כפי שתראו בתמונה, כך שהקארדסטוק הכהה מהווה מעין צל לקארסטוק הבהיר.
5. מדביקים את הקארדסטוקים מעל גבי הבורדר
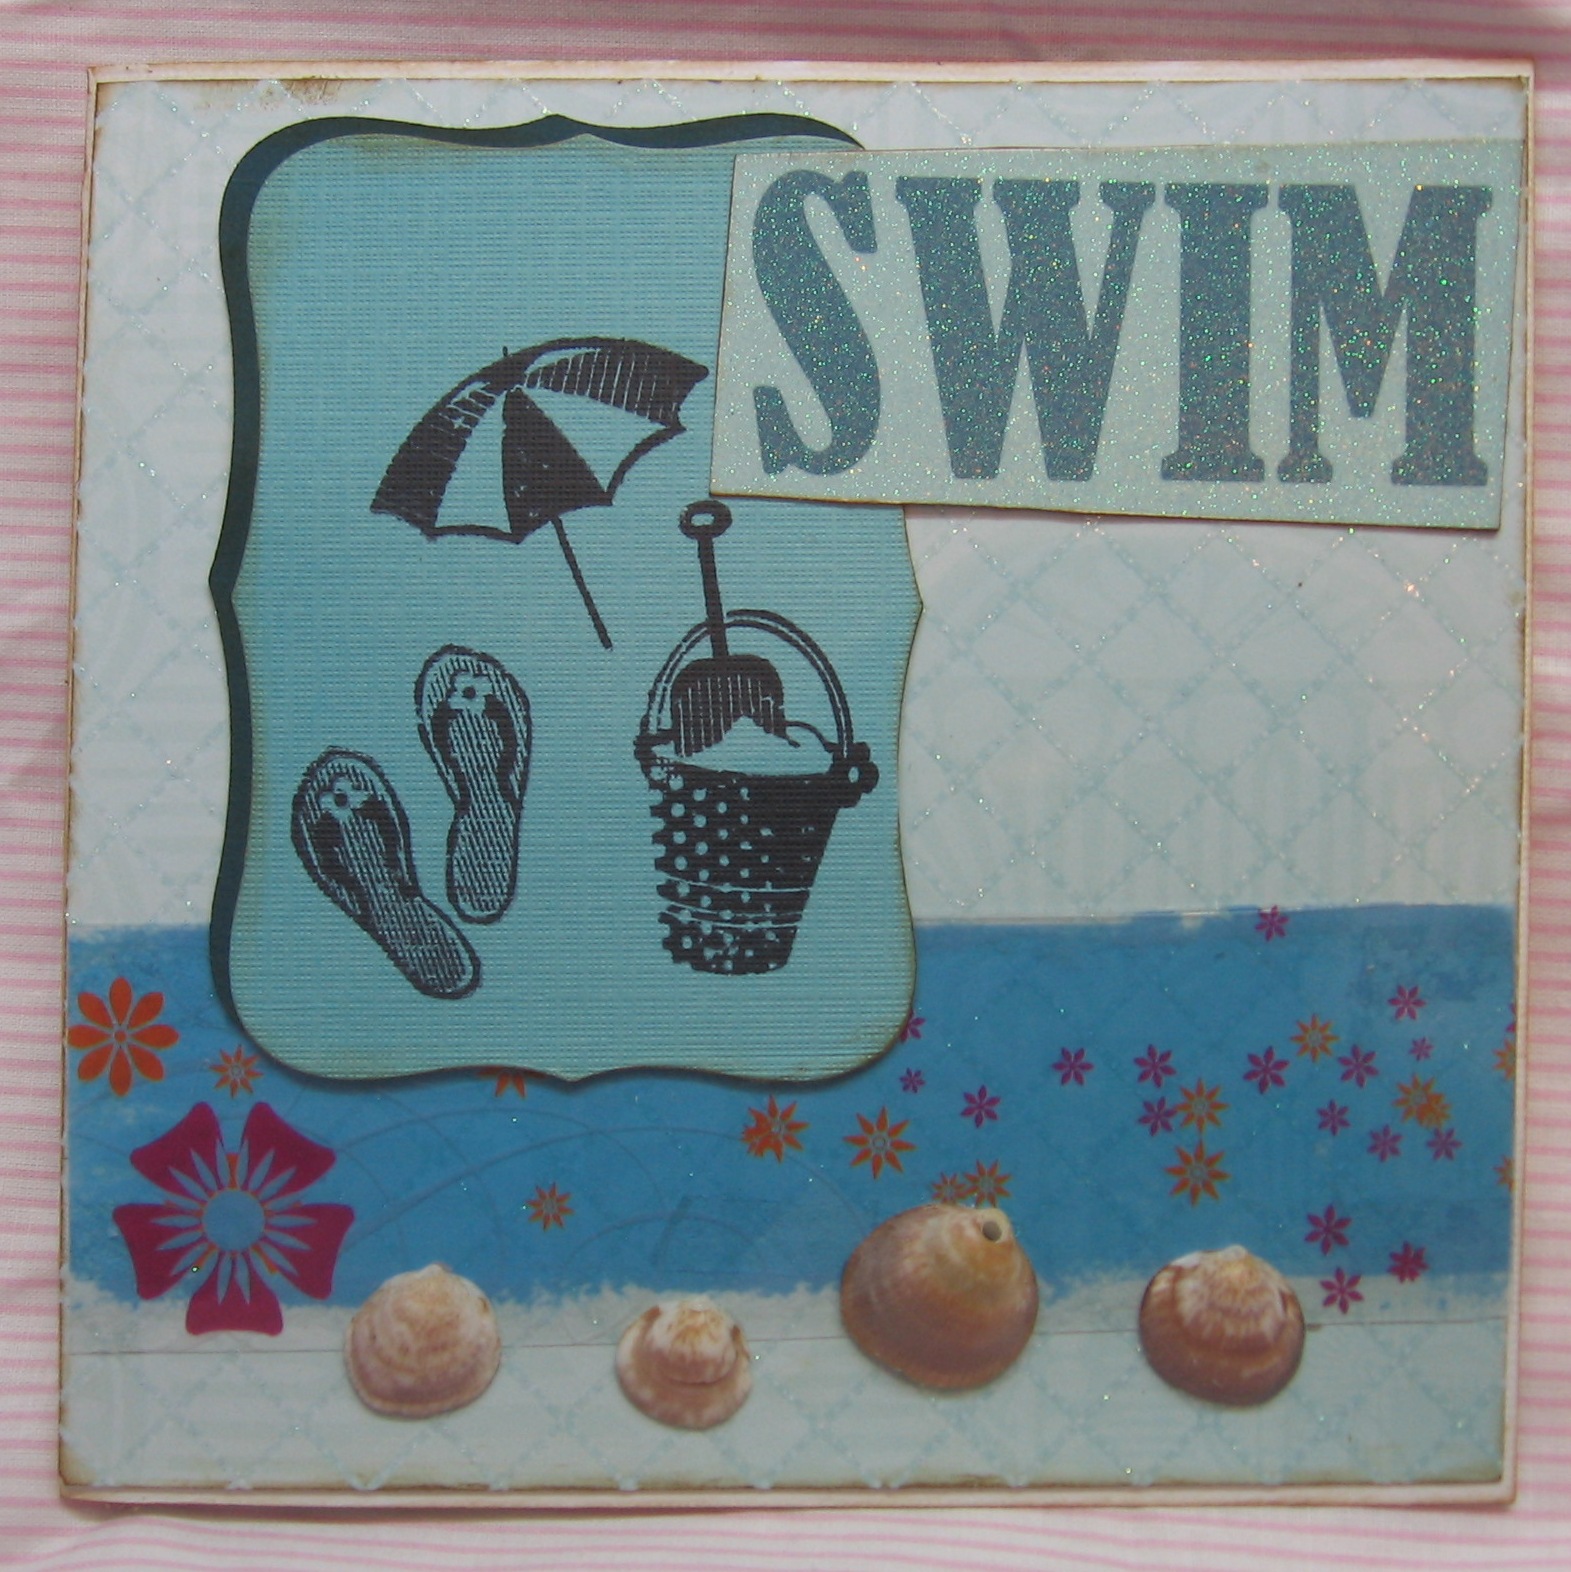
6. בכרטיס הזה בחרתי להשתמש בטקסט מוכן מראש. אני אוהבת ללכלך מעט את השולים עם דיו דיסטרס וינטאג, ואז הדבקתי אותו לכרטיס בחלקו העליון.

7. "מלכלכים" את שולי הכרטיס כולו, ומדביקים אותו לדף הקארדסטוק בסיס הכרטיס.
8. עכשיו נותר רק לקשט את הכרטיס, ואני בחרתי להדביק עליו כמה צדפים אמיתיות.
זהו. הכרטיס שלי מוכן.

עכשיו רק נותר לנו לראות אילו יצירות תכינו אתם.
אולי משהו בהשראת אחת מעבודות חברות הצוות?
אולי משהו בהשראת ההדרכה של זהבית?
אולי בכלל משהו אחר? שונה?

נכון. הדרכה חודשית! הפעם הכינה זהבית את ההדרכה.
June started, which means that today we have our...
That's right. A monthly tutorial! This time Zehavit prepared the tutorial.
אבל לפני ההדרכה, בואו נראה מי ניצח בסקיצה 68:
But before we get to the tutorial, let's see who won in sketch 68:

ל' בריבוע - L Squared
והשלישייה המובילה:
And the Top3:

דבורה - Dvora

אורית - Orit

Shellshearer
מזל טוב לכל הזוכות. אתן כמובן מוזמנות, כמו תמיד, להוריד לעצמכן את התגיות המתאימות לבלוגים שלכן.
Congrats to all the winners. You are, as always, welcome to grab the relevant tags for your blogs

הסקיצה השבוע היא סקיצה מס' 70:
Our sketch this week is sketch No 70:

והאתגר הנלווה הוא אתגר נושא: קיץ.
And the challnge is a theme challange: summertime.
הנה עבודות הצוות:
Here's what the DT members created:

אמנדה - Amanda

היידי - Heidi

אולה - Ola

אורלי - Orli

ריקי - Riki

שיר - Shir
זהבית - Zehavit

דיילי - Dailly
ההדרכה החודשית - The Monthly Tutorial
את ההדרכה החודש הכינה זהבית.
The tutorial this month was prepared by Zehavit
מה צריך?
קארדסטוק בגודל 6*6 אינטש שישמש כבסיס לכרטיס.
נייר מדוגם בגודל 6*6 אינטש
2 ניירות קארדטוק בגוונים מתאימים לנייר המדוגם
בורדר (מקרה שלי שקף)
חותמות ודיו
קישוטים שונים
What we'll need:
1 6*6 inch Cardstock paper – to be the base for this card
1 6*6 inch patterned paper
2 cardstock papers in shades matching the patterned paper.
Border (mine is acetate)
Stamps and ink
Embellishments

1. מדביקים את הבורדר אל הדף המדוגם (אין תמונה). מכיוון ששלי הוא בורדר משקף, הדבקתי רק בכמה נקודות של דבק עכבר, שאסתיר בהמשך.
1. Glue the border to your patterned paper (NoPhoto). Since mine was an acetate border, I used only a few glue dots that I'll hide later on.
2. חותכים את שני דפי הקארדסטוק לצורה בה בחרנו להשתמש באלמנט המרכזי שלנו. שניהם באותו גודל בדיוק. ניתן להשתמש כמובן בחיתוכי נייר מוכנים מראש.
2. Cut the two colored cardstock papers to the shape we chose for the main element. Both should be cut to the same size. You can also use pre-cut paper shaped.

3. ממקמים את החותמות על הבלוק האקרילי ומחתימים על החיתוך הבהיר יותר.
3. Position your stamps on the acrylic block and stamp on the lighter cardstock.


4. מדביקים את חיתוך הנייר הבהיר על גבי חיתוך הנייר הכהה בהסטה הצידה ולמטה של כמה מילימטרים, כפי שתראו בתמונה, כך שהקארדסטוק הכהה מהווה מעין צל לקארסטוק הבהיר.
4. Glue your lighter die-cut paper on top of the darker one. Make sure to move the lighter cardstock a few mms to the side and down, so the darker cardstock created sort of a shadow to the lighter one.

5. מדביקים את הקארדסטוקים מעל גבי הבורדר
5. Glue the cardstocks on top of the border.
6. בכרטיס הזה בחרתי להשתמש בטקסט מוכן מראש. אני אוהבת ללכלך מעט את השולים עם דיו דיסטרס וינטאג, ואז הדבקתי אותו לכרטיס בחלקו העליון.
6. In this card I chose to you a pre-made text. I like distressing the edges with a vintage distress ink, and them I glued it to the upper part of my card.

7. "מלכלכים" את שולי הכרטיס כולו, ומדביקים אותו לדף הקארדסטוק בסיס הכרטיס.
7. I distress the edges of the entire card with the ink, and glue it the cardstock who is the base of this card.
8. עכשיו נותר רק לקשט את הכרטיס, ואני בחרתי להדביק עליו כמה צדפים אמיתיות.
זהו. הכרטיס שלי מוכן.
8. All that's left is the embellishment of the card, and I chose to do that with some real seashells.
That's it. My card is done.

עכשיו רק נותר לנו לראות אילו יצירות תכינו אתם.
אולי משהו בהשראת אחת מעבודות חברות הצוות?
אולי משהו בהשראת ההדרכה של זהבית?
אולי בכלל משהו אחר? שונה?
All that's left is to see what creations you'll make.
Maybe it'll be something inspired by one of the team members?
Maybe it'll be something inspired by Amanda's tutorial?
Maybe something else entierly?

תגובה 1:
איזה עבודות יפהפיות!!
חתולי8
הוסף רשומת תגובה